
Author: Craftsmen Home Improvements

How Much Does A 14×20 Deck Cost? (Breakdown)

Thinking about adding a deck to your home? A 14×20 deck is a sweet spot for a lot of people. It’s big enough for a grill, a table, and some chairs without swallowing your whole yard. 

But before you start daydreaming about summer cookouts, you probably want to know the big question: how much is this going to cost?

It depends on materials, labor, and a handful of extra details that sneak into the budget.

In this post, we’ll break down the average 14×20 deck cost, and the factors that affect the final price.

Average 14×20 Deck Costs

A 14×20 deck costs around $8,500 to $20,000 depending on how it’s made.

A 14×20 deck gives you about 280 square feet of outdoor space. In the U.S., decks usually fall in a range of about $30 to $60 per square foot installed. 

Do some quick math and you’re looking at something like $8,500 on the low end to $16,800 on the higher side.

That’s just a ballpark. If you go with high-end composite boards, fancy railings, or built-in extras, the price can push well over $20,000. On the other hand, a simple pressure-treated wood deck with no frills could be closer to $7,500 to $9,500.

So, think of that range as a starting point. The real number depends on the details you choose.

Average 14x20 Deck Cost

Also Read: How Much Does A Deck Cost In Minnesota?

Factors That Affect The Cost Of A 14×20 Deck

The cost of a 14×20 deck comes down to a handful of main factors. Each one pushes the price up or down depending on the choices you make. Let’s go over the main factors:
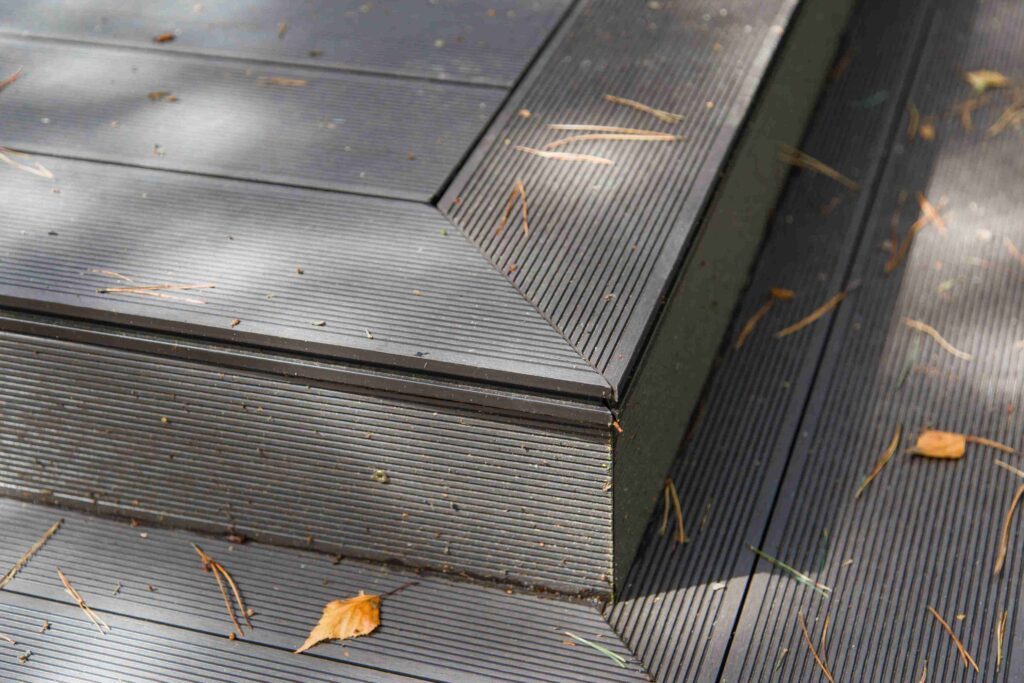
#1 Material

Material choice is usually the single biggest factor in your deck budget. Here’s a look the prices:

Material TypeAvg Cost Per Sq FtNotes
Pressure-Treated Wood$15 – $25Affordable, needs regular sealing/staining
Cedar / Redwood$25 – $35Natural resistance, mid-range price
Composite Decking$30 – $45Low maintenance, wide variety of styles
PVC / Vinyl$35 – $55Very durable, resistant to moisture
Exotic Hardwoods (Ipe)$40 – $60+Premium look and durability, labor-intensive

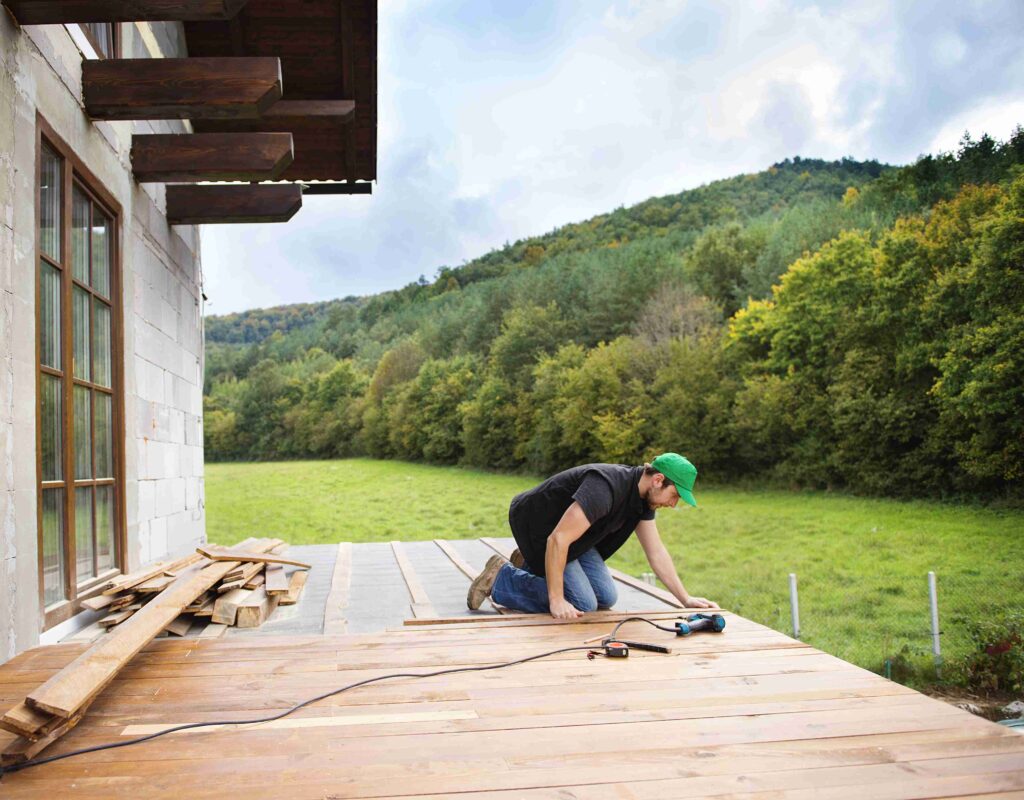
#2 Labor And Contractor Rates

Labor often matches or even exceeds material costs. 

A skilled crew can charge anywhere from $15 to $35 per square foot, depending on where you live and the project’s complexity. If you live in a high-cost area, expect rates to lean toward the higher side.

It’s not just about putting boards down. Contractors have to dig and pour footings, frame the structure, handle railing systems, and ensure everything meets building codes. 

All of that takes time and skill. 

The more complex the design, the longer it takes, and the higher the labor bill.

Also Read: Can You Paint Hardie Board?

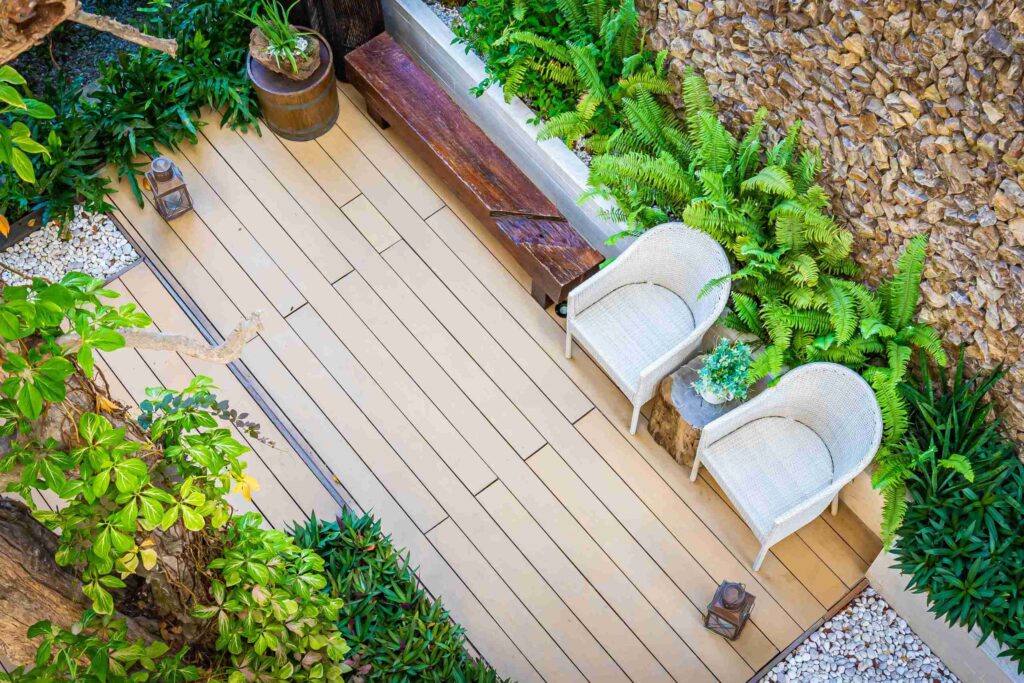
#3 How Complex The Design Is

The design can take a straightforward deck and double its price. 

A plain 14×20 rectangle with no frills is the cheapest setup. Add curves, multiple levels, built-in benches, or planters, and you’ll see costs rise. Even choosing to lay boards diagonally instead of straight adds more waste and extra time.

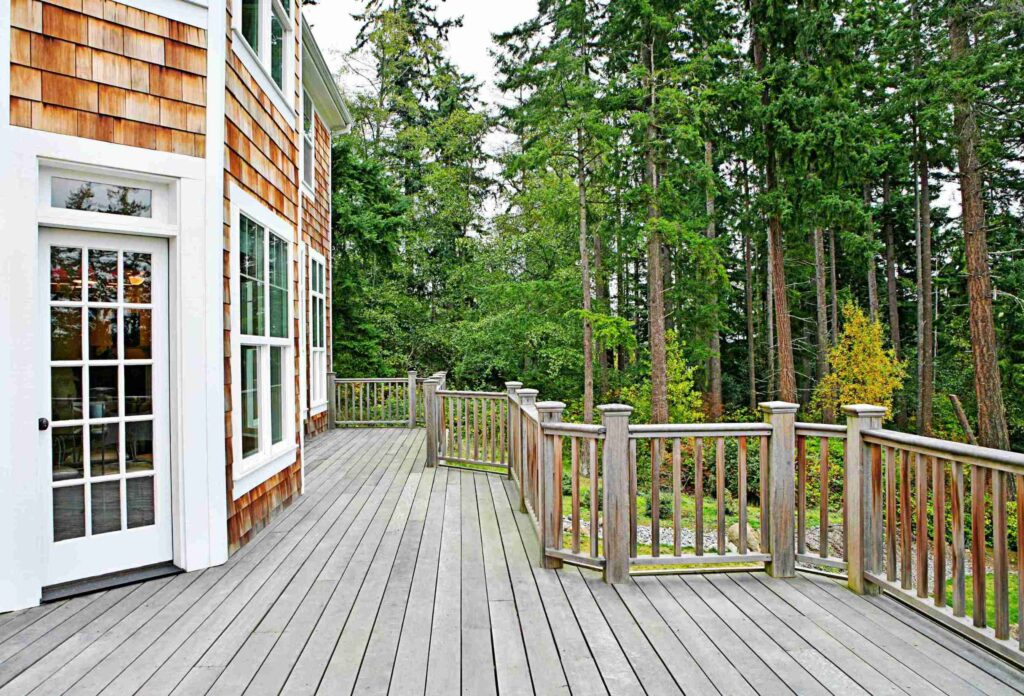
The same goes for railing choices. A simple wood railing is budget-friendly. Metal, glass, or cable railing systems look amazing but cost a lot more. 

Every “upgrade” adds to both material and labor bills.

Think of it this way: the more custom the design, the more your deck becomes a project instead of just a platform.

#4 Foundation And Site Prep

What’s underneath your deck is just as important as what’s on top. 

Every deck needs a strong foundation, usually poured concrete footings. If your yard is flat, this is fairly straightforward. But if the ground is sloped, rocky, or soft, things get tricky.

Extra digging, grading, or support posts can add thousands to the final price. 

Elevated decks or ones built over uneven ground require stronger framing and more engineering. Even soil conditions matter – clay, sand, or loose soil all change how deep or wide your footings need to be.

This part of the project isn’t visible once the deck is built, but it’s critical for safety and durability. 

Factors That Affect The Cost Of A 14x20 Deck

Cutting corners here can cost way more down the line.

Also Read: 2×6 Vs 5/4 Decking

#5 Permits And Inspections

Permits are one of those hidden costs people forget about until they’re hit with the bill. 

Most cities or counties require a permit for any deck over a certain height or size. Fees usually fall between $100 and $500, though some areas charge more.

Once construction starts, inspectors may come out to check the footings, framing, and final build. These steps are there to make sure the deck is safe and built to code. 

Skipping them can lead to fines or problems when selling your home later.

Contractors usually handle permits and inspections for you, but they’ll roll the cost into their estimate.

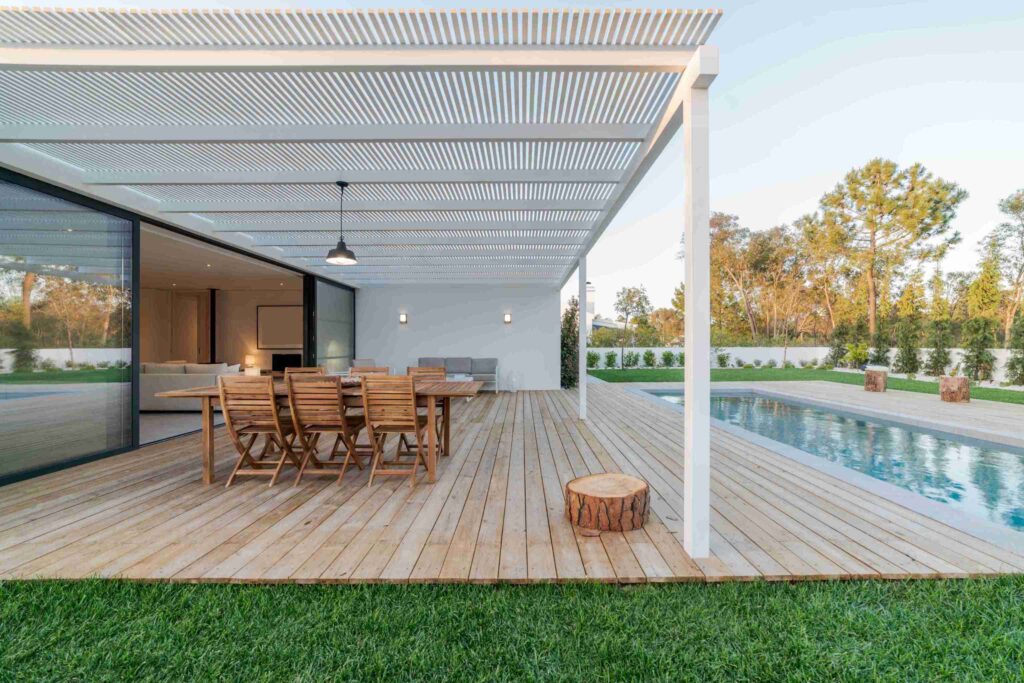
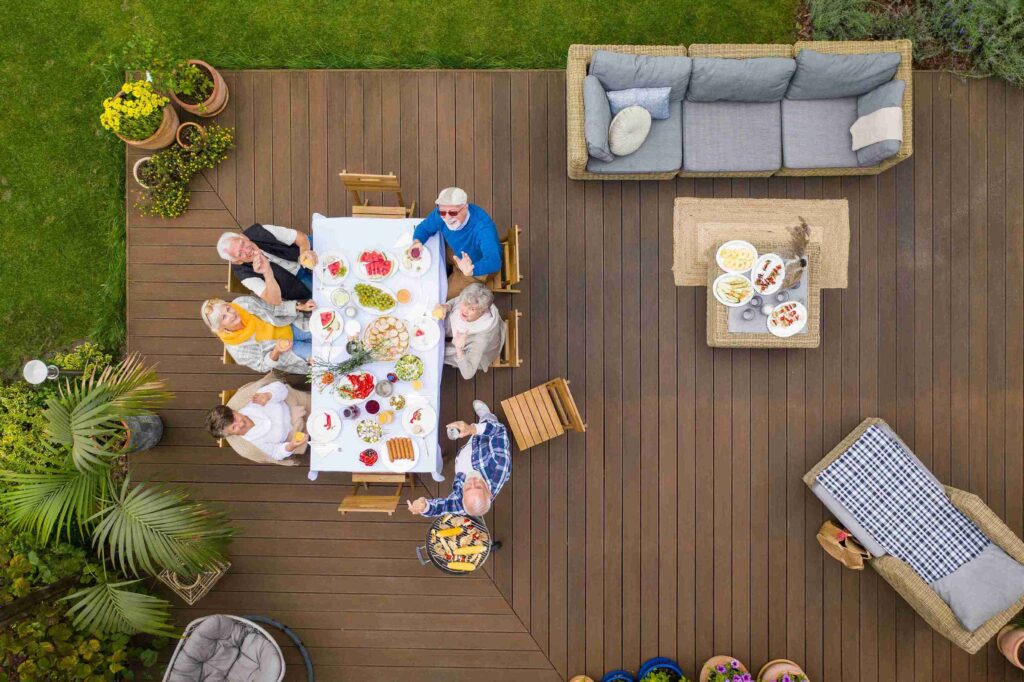
Additional Costs To Consider

Even if you’ve priced out materials and labor, a few extra things can sneak into your budget. Keep these in mind:

  • Railings
  • Stairs
  • Lighting
  • Skirting or fascia boards
  • Furniture and decor

Don’t forget about long-term maintenance. 

Wood decks need to be sealed or stained every couple of years. That’s extra time and money. Composite doesn’t need that, but the upfront hit is higher. 

Either way, your deck isn’t a set-it-and-forget-it project.

DIY Vs Hiring A Contractor

Building a deck yourself can save a lot of cash.

Material costs stay the same, but you skip the labor charges. For a 14×20 deck, that could mean saving ten grand or more.

But here’s the catch. Decks aren’t just about laying boards. You need to know how to set posts, pour footings, and make sure everything is square and safe.

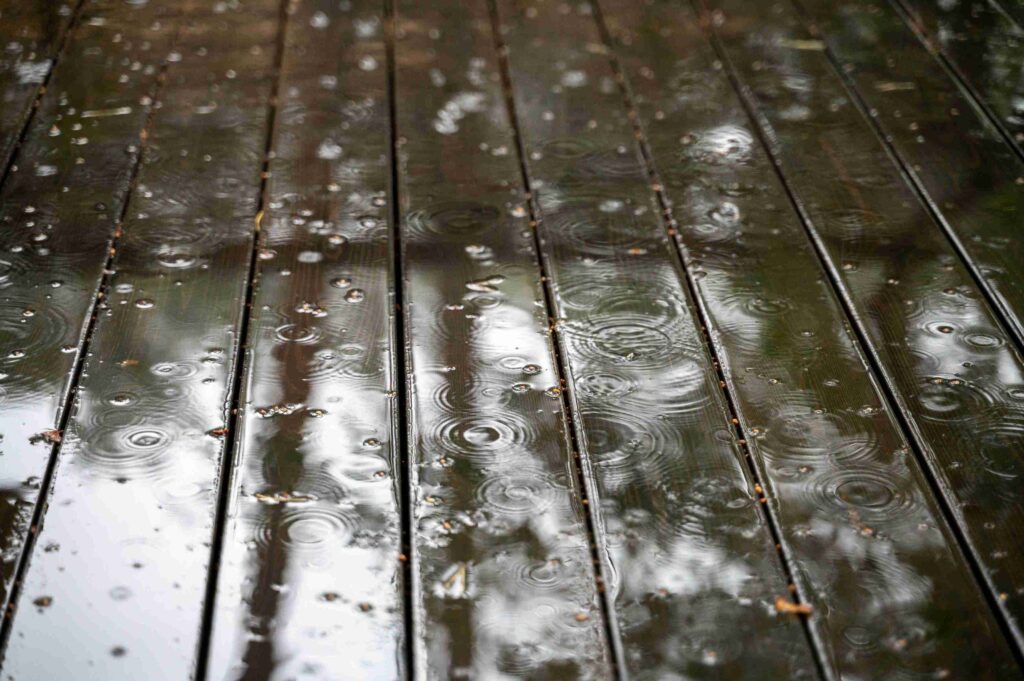
Also Read: Rain On Deck After Staining

Mistakes can cost more down the road than just hiring a pro in the first place.

A contractor also knows local codes and how to get permits squared away. They’ll usually finish faster too. DIY can take weeks of weekends, while a crew might wrap it up in under a week.

If you’re handy and confident, DIY is an option. If not, paying for peace of mind and quality might be the smarter route.

Bottom Line

A 14×20 deck usually falls in the range of $8,500 to $20,000 for most homeowners, with plenty of wiggle room depending on materials, design, and extras. 

The price you pay depends on how fancy you get with the design, how tricky the yard is, and if you hire pros or go the DIY route. 

Add in extras like railings, lighting, or a pergola, and the budget climbs higher.

At the end of the day, the best way to nail down your number is to get a few local quotes. That gives you a clear picture of what your dream deck will really cost in your area. 

Then you can plan, budget, and get ready to enjoy that perfect outdoor space.

Can You Paint Hardie Board? (Yes – Here’s How)

Hardie board siding is built to last, which is why so many homeowners love it. 

But just because it’s tough doesn’t mean you’re stuck with the color it came in. You can absolutely paint Hardie board, and when it’s done right, the finish looks gorgeous and holds up for years.

It’s one of those projects that feels a little intimidating at first, but once you know the right steps, it’s actually super straightforward.

In this post, we’ll show you how to paint Hardie board without headaches or wasted time.

Can You Paint Hardie Board?

Yes, you can paint Haride boards. 

Hardie board is designed to take paint well. In fact, most boards come pre-primed from the factory, which makes the painting process easier. 

And even if your siding has been up for a while, you can freshen it up with a new color whenever you’re ready.

One thing to keep in mind is prep. The paint only sticks as well as the surface allows, so cleaning, repairing, and priming (if needed) are super important. 

Once the prep work is handled, Hardie board actually holds paint much better than some other siding materials, like wood, which can peel or warp. Done properly, you’re looking at a paint job that lasts 8 – 12 years or more.

Painting Hardie Board

Also Read: 8 Reasons Why James Hardie Siding Is Worth It

What Kind Of Paint Works Best?

The best option for Hardie Board is 100% acrylic latex exterior paint

This type bonds tightly to the siding, resists cracking, and handles sun, rain, and temperature swings like a champ.

Oil-based paints? Skip them. They don’t adhere well to fiber cement and can actually shorten the life of your paint job. Stick to acrylic latex for a smooth, durable finish.

For sheen, satin or semi-gloss are popular choices. 

Satin gives you a subtle look that hides imperfections but still cleans easily. Semi-gloss is shinier and reflects more light, which makes it easier to wash but also highlights flaws. 

Either way, you’ll end up with a finish that looks fresh and sharp.

How To Paint Hardie Board

Here’s the fun part: actually getting paint on the boards. But before you dip that brush, make sure you move through the steps in order:

#1 Clean The Surface

If your Hardie board has a layer of dirt, dust, or mildew on it, the paint won’t stick. 

A quick rinse with a garden hose often does the job, but for tougher spots, a gentle pressure wash or a scrub with a soft brush and mild detergent works best.

Don’t go too heavy with the pressure washer, though – you don’t want to damage the siding. 

Once you’ve rinsed everything down, give it time to dry completely, since painting over even slightly damp boards can trap moisture and lead to peeling later on.

Also Read: Caulk Cracking Around Windows

2 Repair Cracks Or Gaps, Then Caulk

Take a good look around your siding after it’s clean. Small cracks, holes, or gaps may not seem like a big deal now, but they’ll show through once the paint goes on. 

Patch these areas so the finish looks seamless. 

How To Paint Hardie Board

Run a smooth bead of high-quality exterior caulk around windows, doors, trim, and joints. 

This doesn’t just make things look better but it also helps seal out water and pests. Let the caulk cure according to the instructions before you move on.

#3 Prime

If your boards came factory-primed, you can usually skip this step for the full surface. 

If your siding isn’t primed, a coat of acrylic primer is essential. It creates a sticky base for your paint and helps ensure even color. 

Any spots you repaired or caulked should also be primed, even if the rest of the siding was already done at the factory. 

Primer is the bonding agent that ties everything together so your final coats go on smooth and last longer.

Also Read: How Much Does Siding Cost In Minnesota?

#4 Paint The Hardie Board

Now it’s time to paint!

Choose a good brush or roller for detail work and larger surfaces, or go with a sprayer if you want to save time on big areas. 

If you spray, make sure to back-roll with a roller so the paint works into the texture of the siding. Work in manageable sections so you’re not racing against drying paint, and always keep a wet edge to avoid streaks or lap marks. 

Be patient and focus on even coverage instead of rushing.

#5 Apply Two Thin Coats For Durability

This is one of those steps where patience pays off. 

Thick, heavy coats might look like they cover faster, but they tend to crack, peel, or bubble down the road. Instead, lay down a light first coat, let it dry completely, then come back with a second thin coat. 

The two layers bond together and form a tougher finish that holds up to weather, sun, and daily wear much better. 

It may feel like extra work, but it’s the difference between a job that lasts a couple of years and one that lasts a decade or more.

Also Read: Can You Put New Siding Over Old Wood Siding? 

#6 Let It Dry

Don’t rush this part since it’s just as important as applying the paint. 

Acrylic paints usually dry to the touch in a few hours, but that doesn’t mean they’re fully cured. It can take days for the paint to harden and form a durable shell. 

Check the paint can for the recommended drying and curing times, and give it the space

While it’s drying, avoid leaning things against the siding, moving outdoor furniture too close, or letting sprinklers hit the freshly painted surface. 

Once it’s fully cured, you’re set with a finish that looks sharp and lasts.

Bottom Line

You can paint on Hardie Board or Hardie Planks. With the right prep and the right paint, your siding will look fresh, protect your home, and stay sharp for years. 

Clean, repair, prime, paint, and be patient – those six steps are all it takes. 

Once you’re done, you’ll have a finish that doesn’t just look good but also stands up to the elements like a champ.

Rain On Deck After Staining? (Here’s What To Do)

You finally did it – you set aside a whole day, rolled up your sleeves, and gave your deck that fresh, beautiful coat of stain it desperately needed. 

You step back to admire your work, maybe even snap a quick photo for bragging rights. 

And then… those dreaded raindrops start falling.

If that sounds familiar, don’t panic. You’re not the first person this has happened to, and your deck isn’t ruined forever. Rain on a freshly stained deck is annoying, but it’s usually fixable.

In this post, we’ll show you what to do if you get rain on deck after staining.

How Does Rain Affect A Fresh Stain?

Fresh stains need time to soak into the wood and cure properly. When rain falls too soon, it interrupts that process.

Rainwater can basically push the stain around before it’s had a chance to settle. Instead of soaking in evenly, the water creates little rivers, puddles, or light patches. 

The result? A blotchy, uneven finish that doesn’t look quite right. 

In some cases, it even leaves behind shiny or sticky spots that refuse to dry like the rest of the deck.

It all comes down to timing. A deck that’s had enough hours to drink in the stain can shrug off a little rain. One that just got coated a few minutes ago? That’s where problems start to show.

How Does Rain Affect A Fresh Stain

Also Read: How Much Does A Deck Cost In Minnesota?

How Soon Did The Rain Hit?

The answer to this question usually determines how much trouble you’re dealing with. 

Timing really is everything.

If the rain shows up within the first hour or two, that’s the worst-case scenario. 

The stain hasn’t had time to soak in, so you might find streaks, washed-out patches, or even spots where the wood looks like it never got stained at all.

Rain that comes after four to six hours (for oil-based stains) or after a good chunk of the day (for water-based) is less of a disaster. At that point, the deck has started absorbing color, so you might only notice a few faint water rings or some light spotting.

Once a full day has passed, you can usually breathe easy. 

If your deck stayed dry for 24 hours after staining, it’s probably safe from rain damage. 

And once the stain has fully cured (usually a couple of days) raindrops won’t do a thing.

What To Look For After It Rains

Once the skies clear and your deck has had time to dry off, it’s inspection time. 

Grab a cup of coffee and take a slow walk across the boards. You’re looking for signs that the rain actually messed with the finish.

Also Read: 2×6 Vs 5/4 Decking

Some of the most common things you’ll notice are:

  • Water spots or faint ring marks where droplets sat on the surface.
  • Patchy, uneven areas that look lighter or washed out compared to the rest.
  • Shiny or sticky patches that didn’t absorb stain properly.
  • Sections of bare-looking wood where the stain may have been lifted away.

If your deck looks smooth and consistent, congrats! You dodged the bullet. 

If not, don’t stress, there are straightforward fixes.

How To Fix Rain-Damaged Deck Stain

You can’t jump straight into repairs while the wood is damp, so take things slowly. With the right approach, you can get your deck looking even again without redoing the entire job from scratch.

How To Fix Rain-Damaged Deck Stain

Here’s what to do:

#1 Let The Deck Dry Completely

First things first: give your deck plenty of time to dry out. 

Depending on the humidity, this could take a full day or two. Don’t rush it. Trying to sand or reapply stain while there’s still moisture in the boards will only make things worse.

A good way to check if the wood is dry is to sprinkle a few drops of water on the surface. 

If they soak in quickly, the deck is ready. If the drops bead up, it’s still holding moisture and needs more time.

Also Read: 8 Trex Decking Problems

#2 Spot-Sand Problem Areas

Once the deck has had a chance to fully dry, it’s time to grab some sandpaper. 

Go with a fine grit, something around 120 to 150 works well. 

The goal isn’t to strip off all the stain; you just want to smooth the blotchy areas and get rid of any shiny or streaky spots caused by the rain.

Sanding also helps open up the pores of the wood again so it’s ready to accept fresh stain.

Take your time and sand gently. Focus only on the areas that look bad. If the rest of the deck looks good, leave it alone. No need to make extra work for yourself. 

After sanding, wipe away the dust with a clean, dry rag so the area is perfectly clean.

#3 Reapply Stain Lightly To Those Spots

Now for the touch-up. 

Dip a brush, foam pad, or rag into your stain, but don’t overload it. Apply a thin, even layer to the sanded spots. The key is to feather the stain outward so it blends into the surrounding boards rather than leaving sharp edges that will stand out once dry.

You want it to disappear into the rest of the surface. 

Take it slow, use small amounts, and wipe away any excess so you don’t get sticky, shiny patches again.

#4 Do A Thin Recoat (If Overall Uneven)

Sometimes rain messes up more than just a few boards. 

If the entire deck looks patchy, the best move is to give it a light overall recoat once everything’s dry. This doesn’t mean starting from scratch – you’re not stripping it down again. It’s more like adding a finishing layer to even things out.

Use a brush, roller, or pad, and work in long, smooth strokes following the grain of the wood. 

Keep the coat light so it soaks in without puddling on the surface. Too much stain at once can cause sticky spots that never cure right. 

After that, give it plenty of drying time before walking on it or putting furniture back.

Tips To Avoid This In The Future

Nobody wants to repeat the whole rain on deck after staining saga. Luckily, a little planning like this saves a lot of headache:

  • Check the forecast like a hawk. Look for at least 48 hours of dry weather before starting.
  • Stain earlier in the day so it gets maximum drying time before nightfall.
  • Use faster-drying products if you live in a place with unpredictable showers.
  • Keep a tarp or large sheet of plastic nearby as an emergency cover if you see sudden clouds rolling in.

Taking these precautions won’t guarantee you’ll never get caught in the rain, but it definitely improves your odds.

Bottom Line

Rain on a deck after staining is not the end of the world. Most of the time, it just means a little extra sanding and touch-up work, and not starting over from scratch.

As long as you give the wood time to dry, take your time with the repairs, and keep an eye on the weather next time, your deck will still look fantastic. 

So, don’t let a surprise rainstorm get you down. 

With a little patience and a few touch-ups, you’ll be back to enjoying your deck in no time.

2×6 Vs 5/4 Decking (What Should I Get?)

Thinking about building a deck and stuck between 2×6 and 5/4 decking boards?

You’re not alone. This is one of those questions that pops up a lot once you start pricing things out and digging into materials.

Both decking boards are super common, and both can work great, but they each come with their own set of pros, cons, and little quirks.

If you’re wondering which one makes more sense for your project, this 2×6 vs 5/4 decking board comparison guide breaks down everything you need to know.

#1 Thickness And Strength

Let’s start with the most obvious difference – thickness.

A 2×6 is thicker than a 5/4 board. Technically, a 2×6 measures about 1.5 inches thick, while a 5/4 board is usually around 1 inch thick. 

That half-inch might not sound like much, but it actually makes a pretty big difference in strength and rigidity.

If you plan on having heavy furniture, hot tubs, or lots of people crowding your deck for backyard barbecues, 2x6s will give you a sturdier feel underfoot. You won’t get as much bounce or flex. 

Some people love that solid, “this deck isn’t going anywhere” vibe.

5/4 boards are still strong, don’t worry. They just aren’t as beefy. They’re great for normal foot traffic and casual lounging, but you might notice a little more give under pressure.

5 4 decking vs 2x6

Also Read: How Much Does A Deck Cost?

#2 Joist Spacing

Joist spacing and board thickness go hand in hand.

If you’re using 5/4 decking, you’re usually going to need joists spaced 16 inches apart (or even 12 inches if you’re using softer wood). 

That’s because the thinner boards need more support.

On the other hand, 2×6 decking can often span joists spaced 24 inches apart without a problem. That’s fewer joists to install, which could save you time and money on framing.

So, if you’re starting from scratch and want to cut back on how much framing you’re doing, 2×6 might win this round.

#3 Weight And Handling

Here’s where the 5/4 boards win some points. They’re lighter.

If you’re doing the deck yourself, lighter boards are easier to carry, cut, and screw down. You’re less likely to get worn out halfway through the project, and it’s easier on your back and your tools.

2x6s, on the other hand, are heavier. They’re a little bulkier to manage. Carrying a pile of those up some stairs or across a yard can be a real workout.

It’s not a dealbreaker, but you’ll feel the difference by the third or fourth board if you’re building solo or working in the heat.

Also Read: How Much Does Siding Cost In Minnesota?

#4 Cost

Ah yes, the big question: how much is this going to cost?

5/4 boards are usually cheaper than 2x6s. You pay less per board, and they’re more common in most big box stores. That means they’re often in stock and ready to go without a special order.

2×6 boards cost more. They use more wood, they’re heavier, and they’re often used in more demanding projects. It all adds up.

So if you’re looking for a clean, functional deck and you’re trying to keep your wallet happy, 5/4 is often the better pick. But don’t forget that 2×6 boards might save you some money on joists if you’re spacing them wider, so it can balance out depending on the project.

#5 Appearance And Style

Let’s be honest… the deck’s gotta look good too.

5/4 boards tend to have a sleeker, more finished appearance. They’re what you’ll often see on modern-looking decks or residential patios. 

They just have that “clean and polished” vibe, especially when stained or painted.

2×6 boards feel a little chunkier. 

It can give the deck a strong, almost rustic look – like it’s made to last decades. That extra thickness also creates deeper shadow lines between boards, which changes the visual feel of the whole deck.

Plus, wider boards (like a 2×6) mean fewer gaps between planks, which can give the deck a different aesthetic overall. Some people love that!

5 4 vs 2x6 decking

Also Read: Trex Decking Problems

#6 Durability

This comes down to what kind of wear and tear your deck will take.

2×6 boards are just more durable, plain and simple. They hold up better under heavy use, heavy furniture, and rough weather. They’re less likely to crack, warp, or split over time – especially if you keep them sealed and maintained.

5/4 boards will last, but they need a little more care. And over time, especially with a lot of sun or moisture, they can show signs of stress faster than thicker boards.

If your deck is going to be the main hangout spot with lots of traffic, a grill, maybe even a hot tub, go with the 2x6s. If it’s just a nice space for morning coffee and the occasional get-together, 5/4 will do the job just fine.

#7 Maintenance

No matter which you go with, you’ll need to do some upkeep.

Both types need to be sealed or stained to prevent rot and weather damage unless you go with composite (which is a whole different conversation). But 2×6 boards take longer to dry out after rain, and they’ll soak up more stain. That means they also take longer to seal.

On the plus side, because 2×6 is thicker, it can handle deeper sanding later down the road if the surface gets rough.

5/4 boards don’t take as much time to stain or seal, and they’re a little easier to replace or repair if needed. Maintenance is just a bit simpler overall.

Best Use Cases For Each

Still torn? Here’s a quick cheat sheet to help:

Go with 2×6 if you’re building:

  • A dock or platform near water
  • A deck that’ll have heavy furniture or a hot tub
  • Something with joists spaced wider than 16”
  • A long-term structure that needs to handle big loads

Go with 5/4 if you’re building:

  • A typical backyard deck with joists 12–16” apart
  • On a tighter budget
  • Something lighter and easier to install solo
  • A clean-looking residential deck with smooth edges

Bottom Line

So… 2×6 vs 5/4? There’s no single “best” choice.

It really comes down to what kind of deck you’re building, how it’ll be used, and what you’re comfortable spending (in money and sweat).

If you want a tank of a deck that’ll stand the test of time, 2×6 is probably your best bet. It’s tougher, thicker, and just plain stronger. But if you want something that’s easier to work with, still plenty sturdy, and easier on your wallet, 5/4 is a great call.

At the end of the day, both will give you a solid deck to enjoy. Pick the one that fits your space, your budget, and your style – and you’ll be good to go.

8 Trex Decking Problems

Trex decking is one of the biggest names in the world of composite decks. It’s low maintenance, lasts way longer than wood, and has a clean, polished look. Sounds perfect, right? 

Well, not quite. While Trex has a lot going for it, it’s not free of issues. 

If you’re thinking about installing it (or already have it) there are a few things to know before you get too cozy on that deck chair.

In this post, we’ll go over some of the most common Trex decking problems. Nothing here is meant to scare you off. It’s just the kind of stuff that helps you know what you’re getting into. And maybe save a few headaches down the road.

#1. Fading And Discoloration

Let’s start with what’s probably the most common complaint: fading. 

Fading and discoloration was super common with older Trex decking (the stuff made before 2010). Even the newer generations, which hold color better, can still get a little washed out after a few years in the sun.

It’s not always even, either. Some boards fade faster than others. You might also notice weird light patches or slightly different tones from one plank to another.

This usually shows up more with darker colors, especially in areas with lots of sunlight.

Trex Deck Issues

 And it’s not just UV rays that cause trouble – food, drinks, sunscreen, and pollen can all leave behind spots or stains that mess with the color.

If you’re dreaming of a deck that looks freshly installed forever, just know that Trex still ages a bit just like everything else outdoors.

Also Check Out Our: Twin Cities Deck Building Services

#2. Mold, Mildew, And Stains

Trex decking may be called “low maintenance,” but that doesn’t mean “no maintenance.” 

One issue people don’t always see coming is mold and mildew buildup, especially in damp or shady spots. Since Trex contains wood fibers, it can still feed mold under the right conditions.

You’ll usually find it:

  • Under flower pots
  • Near downspouts or gutter drips
  • Between boards where leaves and debris settle

Even though the surface doesn’t absorb moisture the way wood does, stuff can still grow on top or in tiny crevices. A little soap and water can help, but it takes regular cleaning to stay ahead.

And if you let it sit too long, the green or black stains can be a pain to get out completely.

#3. Scratching And Surface Wear

Trex is tough, but not invincible. 

Scratches are definitely possible. Dragging furniture across it? That’ll probably leave marks. Dropping tools or pushing something heavy across the surface? Same deal.

The lighter colors tend to hide scratches better than the darker ones. 

But if your deck is a high-traffic zone (pets, kids, parties) expect to see a few scuffs over time. 

Trex doesn’t sand like wood, so if something leaves a deep gouge, you can’t just fix it with a quick sanding. You’re stuck with it, or you’ll need to swap out the board.

Pro tip: Use furniture pads, or just lift instead of dragging.

Also Read: How much does a deck cost in Minnesota?

#4. Heat Retention

Ever tried walking across your Trex deck barefoot in the middle of July? 

If so, you already know how hot it can get. Composite decking, especially in darker shades, gets really warm under the sun. Sometimes even hotter than wood.

This can be a major downside if you live somewhere sunny and love going barefoot outside. 

People with dogs especially complain about it because their pets don’t want to walk on it in the summer heat. And once that heat builds up, it stays warm for a while.

Here are some ways to deal with this:

  • Choose a lighter color board if possible
  • Add a rug or shade canopy
  • Hose it down before walking on it

It’s not a dealbreaker, but it’s definitely something to think about if you’re designing a pool deck or wide-open patio.

#5. It’s Expensive

No way around it – Trex costs more than wood. Plus, you’re going to pay quite a bit more for materials and probably a bit more for installation, too.

Now, to be fair, Trex pays off long-term by cutting down on maintenance costs. You won’t need to stain it every year or worry about termites. 

Composite Decking Problems

But for some homeowners, the higher price doesn’t feel totally worth it, especially if they run into any of the other issues mentioned here.

You also can’t forget about the cost of add-ons. Hidden fasteners, fascia boards, matching railings – it all adds up fast. 

If you’re planning on going full Trex, make sure the budget can handle it.

#6. Expansion And Contraction

Composite decking doesn’t just sit still. It moves

Temperature swings can cause Trex boards to expand or contract. This is totally normal, but it can lead to some annoying issues if not installed properly.

You might see:

  • Small gaps appear or close up depending on the weather
  • Boards slightly shift out of alignment
  • Fasteners loosen over time

That’s why proper spacing and installation are so important with Trex. 

If a contractor doesn’t leave enough room for the boards to move, things can start to warp, twist, or buckle. Even when installed correctly, you might still notice a little shifting with the seasons.

#7. Chalking Or Flaking (Rare)

This one doesn’t happen often, but when it does, it’s super frustrating. 

Some people report a chalky white film or light flaking on the surface of their deck. This usually happens with older Trex models or when someone uses a harsh cleaner not meant for composites.

It’s cosmetic, but it makes the deck look weathered or dusty no matter how much you clean. 

Trex says this kind of issue shouldn’t happen with their newer boards, and that’s mostly true. Still, if you’re cleaning your deck, stick with approved products just to be safe.

Also Read: 8 Reasons Why James Hardie Siding Is Worth It

#8. Difficult Repairs

This might be the most frustrating Trex decking problem of all. 

If a Trex board gets damaged (cracked, warped, or deeply scratched) there’s no easy fix. You can’t sand it, stain it, or repair it like you would with wood. 

The only real solution is to replace the board.

And that’s easier said than done. By the time you’re swapping out a damaged board, your deck has probably aged a bit. That means the new board won’t match the old ones. 

This happens even if it’s technically the same product and color, because sun and weather exposure will have changed the original color.

So now you’ve got a shiny new plank in the middle of your faded deck. And unless you’re willing to replace more boards or rearrange them, it’ll probably stand out.

Why Trex Decks Are Still Great Despite These Problems

Trex is still one of the most popular decking choices for a reason. It has plenty of strengths that keep people coming back, even with a few quirks.

For starters, you don’t have to stain, seal, or paint it. That alone saves a ton of time (and money) year after year. Wood might be cheaper upfront, but by the time you’ve pressure washed, sanded, and stained it three times, you’re wishing you’d gone composite from the start.

Trex also doesn’t rot. It won’t attract termites or splinter like wood. So once it’s in, you can mostly forget about it. Just give it a quick sweep and rinse now and then, and you’re good.

Plus, the newer lines (like Trex Transcend) look really sharp too.

They’ve come a long way from the older stuff. You get realistic wood grain, cool color options, and hidden fasteners that give it a clean, modern finish. If you’re building an outdoor space you want to show off a little, Trex delivers.

So yes, it’s not flawless. But it does a solid job of giving you a beautiful, low-hassle deck that holds up well over time.

Bottom Line

A Trex deck can be a great investment, but it’s not perfect. It can fade. It can scratch. It can grow mold or get hot enough to cook your feet in July. Plus, the price is high, and repairs can be tricky. 

But most of these problems are manageable if you go into it with open eyes.

If you’re expecting a zero-maintenance deck that stays flawless forever, you might feel let down. But if you’re okay with a few quirks, Trex can still be a solid choice. It looks good, lasts a long time, and saves you from sanding and staining every year.

Just keep it clean, treat it gently, and try not to drag your grill across it. That’s a good start.

How Much Does A Deck Cost In Minnesota?

Thinking about adding a deck to your backyard in Minnesota? It’s a great idea!

A deck can totally transform your outdoor space, making it the perfect spot for relaxing, grilling, or entertaining guests.

But before you dive in, you probably want to know what you’re getting into financially.

In this post, we’ll break down how much a deck costs, and what affects the price, so you can plan ahead and avoid surprises. Plus, we’ll also give you a rundown of our deck building prices.

Our Twin Cities’ Deck Building Prices

Check Out Our: Minnesota Deck Building Services

How Much Does A Deck Cost?

A deck will cost somewhere between $7,000 and $25,000 in Minnesota, depending on the size, materials, and layout. 

The bigger and fancier it gets, the more you’ll spend. 

How Much Does A Deck Cost

For example, a small, basic deck using pressure-treated lumber might cost around $7K. A larger one using composite boards with custom stairs and railings could push well over $20K.

Most homeowners end up spending around $30 – $60 per square foot, including both materials and labor.

Here’s a quick cost breakdown to give you a clearer picture:

DeckAvg Cost
Small deck (200 – 400 ft²)$7,000 – $14,000
Mid-size deck (400 – 600 ft²)$14,000 – $25,000+
Large/Complex deck$25,000 – $40,000+
Per‑ft² (total)$30 – $60
DIY material cost$14 – $28
Permits$200 – $500

Factors That Affect The Cost Of Building A Deck

Building a deck in Minnesota is a bigger project than you might think. A lot goes into the process, from design to permits to the materials you pick. 

Let’s go over the biggest factors that can swing the cost one way or the other:

#1. Deck Size

This is obviously the biggest factor that affects how much a deck costs.

A larger deck requires more materials, more labor, and more time to build. If you’re looking at a small 10×10 deck, you’ll pay a lot less than if you want a sprawling 20×30-foot deck.

The bigger the deck, the more everything adds up. 

So if you’re just looking for a small area for a couple of chairs and a grill, you’ll be able to keep costs lower. But if you want a multi-level deck or something that extends across your entire backyard, be prepared for a much higher bill.

Also Read: Trex decking problems

#2. Material Type

Materials are probably the next biggest cost driver. You’ve got a range of options, and each has its price tag. Here’s a quick rundown of your options:

MaterialAvg Cost (per sq ft installed)
Pressure-treated wood$15 – $25
Cedar$25 – $35
Composite (like Trex)$35 – $60+
PVC/Vinyl$40 – $70+

Each material has pros and cons, so your choice will depend on your budget, maintenance preferences, and how long you plan to stay in your home.

#3. Labor Costs

Unless you’re building the deck yourself, labor is a major part of the budget.

Contractors typically charge by the square foot, and that rate depends on the local market rates.

In Minnesota, labor usually runs $15 to $35 per square foot, sometimes more for custom work or complicated layouts.

The cost will also vary depending on the complexity of your deck and the experience of the contractor. A simple rectangular deck is easier to build than something with intricate curves or custom features.

So, keep this in mind when you’re planning your budget.

Also Read: How Much Does Siding Cost In Minnesota?

#4. Design Complexity

The more complex the design, the more it will cost. 

A straightforward, simple deck will cost less than one with custom details, multiple levels, or built-in features like benches, planters, or even a hot tub.

Factors That Affect The Cost Of Building A Deck

If you want a deck that’s more than just a flat platform, you’ll pay more for the design. 

Things like stairs, railings, and unique shapes require more work, and custom features usually come with a higher price tag. 

Plus, if you want a deck that matches the style of your house, a little extra design work might be needed, too.

#5. Foundation And Framing

Minnesota weather means you’ve got to build for durability, especially in the winter. That starts with your foundation. 

In most areas, you’ll need footings dug below the frost line to prevent the deck from shifting or cracking as the ground freezes and thaws. 

That’s more labor, more concrete, and sometimes special equipment.

Sloped yards or rocky soil can add extra headaches. You may need taller posts, additional bracing, or heavy-duty framing materials. Even if you can’t see this part of the deck, it’s doing the heavy lifting – literally. 

And those structural elements don’t come cheap.

#6. Railings And Stairs

Not all decks need railings and stairs, but most do. And those extras aren’t cheap.

Stairs vary depending on the height and style of the deck. A basic set of stairs might be a few hundred bucks. Wrap-around stairs with landings or turns? Now we’re talking thousands.

Railings also vary a ton in price. Pressure-treated wood rails are cheaper. Metal or cable railings look sleek but cost more. Glass panels? Gorgeous, but pricey.

#7. Permits And Inspections

This is something you can’t skip. Decks that are more than a few feet off the ground or attached to your house will usually require a permit. 

Every city or county in Minnesota has its own rules, but most charge $200 to $500

Plus, you’ll likely need to submit drawings or specs, which might require help from a builder or designer.

During the project, an inspector will check to make sure everything meets local codes. This includes footings, railing height, joist spacing, and how the deck is attached to your home. 

It’s all necessary, but it adds some time and cost to the process.

Also Read: Can You Put New Siding Over Old Wood Siding?

#8. Demolition And Site Prep

Got an old, worn-out deck you’re replacing? 

You’ll need to tear it down and haul it away before the new one goes in. That typically costs $5 to $15 per square foot, depending on how big the deck is and how difficult it is to remove.

Even if you’re starting fresh, the yard might need prep work. That could mean grading uneven ground, removing bushes or trees, or clearing rocks. 

And if you’re dealing with tight access (like a fenced yard or narrow side yard), that can slow things down and bump up labor costs too.

Bottom Line

A deck in Minnesota can cost as little as $7,000 or soar past $25,000, depending on size, materials, and all the bells and whistles. 

Most homeowners land in the $10,000 – $15,000 range for a comfortable, mid-size setup.

If you’re trying to keep costs in check, go for a smaller, simpler design with pressure-treated wood. On the other hand, if you want something fancier with all the bells and whistles, be prepared to pay more.

Whatever you choose, just make sure to plan your budget carefully and keep track of all the hidden costs (like permits and site prep).

How Much Does It Cost To Replace A Roof In Minnesota?

If you’re reading this, chances are you’ve been staring at your roof lately and thinking, “Hmm, maybe it’s time.” Or worse, you’ve already spotted some leaks or missing shingles.

Either way, replacing a roof is a big deal. Not just because it’s a huge chunk of your house, but also because it can be pretty expensive.

In this post, we’ll break down our roof replacement costs in Minnesota.

Plus, we’ll also go over how much it costs to replace a roof on average, and the main factors that affect the total cost, so you can get a better idea of what to expect.

Our Minnesota Roof Replacement Prices

Our roof replacements cost around $15,000 to $30,000 for an average-sized home. The price depends on the size of your roof, how complex the job is, and what materials you choose.

Here’s what’s included in the installation:

  • Tearing off and hauling away the old roof
  • Checking for damage and making any necessary repairs to the roof deck
  • Installing a high-quality underlayment for extra protection
  • Putting on new shingles or other roofing materials of your choice
  • Adding proper flashing and ventilation to make your roof last longer
  • A full cleanup when we’re done

We install strong, long-lasting roofs that can handle Minnesota’s tough weather.

Contact us for a FREE quote, and we’ll give you a clear price based on your roof.

Also Check Out Our: Twin Cities Roof Replacements Services

How Much Does Roof Replacement Cost?

Roof replacement costs about $6000 – $30000 in Minnesota.

Generally speaking, about 40% of the cost is for materials, and the other 60% goes to labor. So, the size of your roof and what kind of material you go with will have the biggest impact on price.

How Much Does Roof Replacement Cost

Here’s a rough idea based on roof size:

  • 1,000 sq. ft.: $4,500 to $11,000
  • 1,500 sq. ft.: $7,000 to $15,000
  • 2,000 sq. ft.: $9,000 to $22,000
  • 2,500 sq. ft.: $11,000 to $27,000

These are just ballpark figures, as the exact price will depend on a number of things which we’ll go over shortly. To get an exact estimate, it’s always best to get a few quotes from local contractors.

Factors That Affect The Cost Of Roof Replacements

There are a lot of factors that can influence the total price. Some of these are pretty straightforward, while others are a bit more unexpected.

Here are the main factors that affect the cost of replacing a roof in Minnesota:

#1 Roof Size

This one’s pretty obvious: the bigger the roof, the higher the cost.

If you have a large home, you’re going to need more materials, and the labor cost will also go up because it’ll take longer to do the job. Smaller homes will obviously cost less.

Also Read: How Much Does A Roof Inspection Cost?

#2 Roof Pitch

Ever noticed how some roofs are almost flat while others are super steep? That’s the pitch—and it matters a lot for pricing.

Steep roofs are harder to work on. They require extra safety equipment, more labor, and often take longer to complete. A roof with a pitch greater than 7:12 (meaning it rises 7 inches for every 12 horizontal inches) might cost 25-30% more than a gentler slope.

So, the steeper the roof, the higher the labor cost.

Many homes in Minnesota have steeper pitches to help shed snow, so this is something to keep in mind when budgeting.

#3 Roof Material

The material you choose for your new roof has a huge effect on your roof replacement cost.

Here’s a quick rundown of the most common options in Minnesota:

  • Asphalt shingles: $3.50-$8.50 per square foot installed. The most popular choice due to affordability and decent lifespan (15-30 years).
  • Metal roofing: $6.00 – $35.00 per square foot installed. Lasts 40-70 years and stands up great to Minnesota snow.
  • Cedar shakes: $6 – $15.00 per square foot installed. Beautiful but requires more maintenance.

If you decide to go with a more premium material, like slate or tile, it can cost around $15-$30 per square foot, but it can last a long time (75+ years!), and it looks really good!

Factors That Affect The Cost Of Roof Replacements

Also Read: 1/2 Or 5/8 Roof Sheathing?

#4 Removing The Old Roof

You’ll probably need to have the old roof torn off before the new one can go up. And tearing off and disposing of your existing roof isn’t free.

Expect to pay $1-$2 per square foot just for removal.

Multiple layers will cost more. Some homes in Minnesota have had layer upon layer added over the decades to avoid complete replacements—we’ve seen homes with three or four layers that cost significantly more to tear off.

The disposal costs add up too. Dumpster rental and landfill fees usually run $500 – $1,000 depending on roof size and material.

Ask your contractor if removal is included in the price or if it’s an additional charge.

Some roofing companies might offer “tear-off” as part of the initial price, while others will add it as a separate cost.

#5 Roof Underlayment

Underlayment is the layer of material placed under your roof shingles that acts as a barrier against water and weather.

There are a few different types of underlayment materials, and the cost of the material can affect how much it costs to replace a roof in Minnesota too.

Standard felt underlayment costs around $0.20 per square foot, but synthetic or ice-and-water shield (crucial for Minnesota eaves) runs $0.50-$0.80 per square foot.

Many Minnesota roofers now recommend ice-and-water shields on the entire roof too.

That adds cost but provides amazing protection against ice dams—a notorious Minnesota roofing problem.

#6 Roof Features

If your roof has extra features—like skylights, chimneys, or vents—be prepared for those to add to the overall price.

These features require more work and special handling, especially if they need to be replaced or repaired during the roof replacement process.

Skylights, for example, require careful sealing and flashing to prevent leaks, which takes extra time and expertise. The same goes for chimneys or roof vents, which often need to be detached and reattached.

These extra steps will naturally increase the price of the roof replacement.

#7 Accessibility

How easy (or difficult) is it to get to your roof? If you live in a two-story home or your roof is hard to access because of trees, power lines, or other obstacles, the labor costs will likely be higher.

Roofers will need to take extra precautions, and in some cases, may need special equipment like scaffolding or ladders to complete the job.

The more difficult it is to access, the more the job will cost.

#8 Location

Minnesota might be one big state, but prices can vary depending on where you live.

If you’re in a big city like Minneapolis or St. Paul, the cost of roof replacement might be a little higher. Cities tend to have more competition and higher living costs, which can increase the overall cost of services.

On the other hand, if you’re in a more rural area, you might find lower prices.

But you could also have fewer contractors to choose from, which might affect availability or the range of materials offered (though this can flip if the contractor has to travel far).

Also Read: When To Replace Windows

#9 Permits And Inspections

Don’t forget the paperwork! Most Minnesota municipalities require permits for roof replacement.

Permits generally cost anywhere from $50 to $300, depending on your location and the type of work being done. You might also have to schedule an inspection once the job is finished, which could add additional fees.

Make sure you check with your contractor and local authorities about the specific permit requirements for your area.

If permits are required, they will be an additional cost to factor into your overall budget.

Bottom Line

It costs around $6000 – $30,000 to replace a roof in Minnesota.

Replacing a roof isn’t cheap, but it doesn’t have to break the bank either. Knowing what affects the cost can help you plan and budget better.

Start by getting quotes from a few different contractors. Ask questions, compare materials, and don’t be afraid to negotiate. And remember, the cheapest option isn’t always the best.

You want a roof that’ll last, especially in a place with four distinct seasons like Minnesota.

How Often Should I Replace My Roof In Minnesota?

Most people don’t think about their roof until there’s a problem. Totally normal.

But in a place like Minnesota, your roof goes through a lot – from heavy snow and ice to summer storms and freezing wind. All that wear and tear adds up over the years.

So if you’re wondering how often you should actually replace your roof, you’re asking a smart question.

The answer depends on the type of roof you have, how old it is, and what kind of shape it’s in.

In this post, we’ll shed some light on how often you should replace your roof.

How Often Should I Replace My Roof?

You should replace your roof every 20 to 40 years, depending on the material and how rough the weather’s been.

Some roofs hold up longer than others, but harsh Minnesota winters can speed things up. Even if your roof looks okay from the street, it might be getting close to the end of its run.

It’s better to replace it on your terms than deal with a surprise leak in the middle of a snowstorm.

Here’s a quick look at how often you should replace each roof type:

Roof Type When to Replace
Asphalt Shingles Every 20–25 years
Architectural Asphalt Shingles Every 25–30 years
Metal Roofing Every 40–50 years
Cedar Shakes Every 20–30 years
Composite/Synthetic Shingles Every 30–40 years

Also Read: How much does it cost to replace a roof?

Asphalt Shingles

Asphalt shingles are probably the most common roofing material in Minnesota. How Often Should I Replace My Roof

They’re affordable and get the job done. On average, asphalt shingles last about 20 to 25 years.

But they can wear out a bit quicker in Minnesota than in milder climates. The freezing and thawing, combined with snow and ice, can speed up the wear and tear.

If you’ve had asphalt shingles for 20 years or so, it’s probably time to start keeping an eye on them. Once you hit the 25-year mark, replacing them might be in your near future.

Metal Roofing

Metal roofing has become more popular in Minnesota over the last few years.

It’s known for being super durable and energy-efficient, which is great when you’re dealing with extreme temperature changes.

A metal roof can last anywhere from 40 to 70 years, depending on the type of metal and quality of installation. And you don’t need to replace them unless it’s damaged.

However, just because it lasts a long time doesn’t mean you won’t need maintenance.

Hailstorms, which we get pretty frequently in Minnesota, can damage metal roofing. So even though you’re not replacing it anytime soon, it’s still important to check for dents or other signs of damage.

Cedar Shakes

Cedar shakes give your home that classic, natural look. They’re not as common as asphalt shingles or metal, but they’re still a good choice if you want a rustic vibe.

The lifespan of cedar shakes is around 30 to 40 years.

However, they might not last as long in Minnesota due to the moisture in the air and extreme temperature changes.

Also Read: 1/2 Or 5/8 Roof Sheathing?

Cedar is a natural material, so it can start to degrade faster than man-made materials. It’s also prone to things like mold and mildew, especially if your roof is shaded or surrounded by trees.

You’ll have to replace cedar roofs every 25 years or so, depending on exposure and upkeep.

Composite Or Synthetic Shingles

Composite or synthetic shingles are a newer option, and they’re definitely gaining popularity.

These shingles are designed to look like wood or slate but are made from a combination of materials like plastic, rubber, and fiberglass. They tend to be more durable than traditional shingles, with a lifespan of 30 to 50 years.

Composite shingles hold up pretty well in Minnesota. They’re resistant to things like rot, mold, and mildew, so they’re a good choice for areas with a lot of moisture.

If you have composite shingles, you’ll need to replace them every 35 – 40 years.

Signs You Might Need A Roof Replacement Sooner

Even if you’ve done everything right in terms of regular maintenance and timely repairs, there may come a time when you need to replace your roof earlier than expected.

Sometimes, things just wear out faster than planned.

Here are a few signs that it might be time to start thinking about a roof replacement sooner rather than later:

Signs You Might Need A Roof Replacement

Also Read: How Much Does A Roof Inspection Cost In Minnesota?

#1 Missing, Curling, Or Cracked Shingles

Take a look at your roof after storms. Do you see shingles that have blown off? Or maybe they’re still there but curling at the edges or cracking?

This is a sign the protective layer of your roof is failing.

Missing shingles create vulnerable spots for water to penetrate. Curling indicates age and weathering. And cracking usually happens from thermal splitting – those dramatic temperature swings we get in Minnesota.

Any of these issues means your shingles are no longer doing their job properly.

Don’t wait on this one. Even a few damaged shingles can lead to bigger problems if its not taken care of quickly.

#2 Ice Dams Forming Regularly

Minnesota winters are brutal. Ice dams happen when heat from your house causes snow on the roof to melt, and then that water refreezes at the edge of the roof.

Over time, this can cause significant damage to your shingles and even the roof’s structure.

If ice dams are forming every winter, it’s a sign that your roof isn’t properly ventilated / insulated.

You might not need a roof replacement immediately, it’s worth addressing this issue before it leads to bigger problems like leaks or mold.

Proper attic insulation and ventilation can help reduce the chances of ice dams forming.

#3 Leaks Or Water Stains On Ceilings

One of the most obvious signs that you need a new roof is when you start seeing water stains or leaks on your ceilings.

This usually means water is getting into your home, and that’s never a good sign. Even small leaks can cause a lot of damage over time, from mold growth to structural issues.

If you’re seeing leaks, you should definitely get a roofer out to assess the situation.

Don’t wait too long to address this! If a leak is happening, it could be a sign that the roof’s protective layer is no longer doing its job.

#4 Sagging Roof Or Visible Mold/Mildew

If your roof starts sagging, or if you notice mold or mildew growing on your roof, those are huge red flags.

A sagging roof can mean that there’s structural damage, and that can be dangerous. Similarly, mold and mildew can spread quickly, especially in Minnesota’s humid summers, and they can weaken your roof.

These signs indicate serious issues that may require a full roof replacement.

If you notice any of these signs, it’s best to get a professional in to inspect your roof and assess the damage. You don’t want to let these issues go unchecked.

#5 Shingle Granules Showing Up In Gutters

Shingle granules are the small bits that coat your shingles, providing protection from UV rays.

Over time, these granules can start to wear off, and you might notice them accumulating in your gutters. This is a sign that your shingles are starting to break down and lose their effectiveness.

If you’re seeing a lot of granules in your gutters, it could mean your roof is nearing the end of its lifespan.

Also Check Out Our Minnesota Roof Replacement Services

Bottom Line

Most people end up replacing their roof every 20 to 40 years, but that number can swing depending on the material, the maintenance, and the weather it’s been through.

Don’t wait until water’s dripping on your dinner table. Keep an eye on your shingles. Peek inside your attic every now and then.

And if your roof is getting up there in years or showing some of those red flags, it’s probably time to call in a pro and at least get an inspection.

Catching issues early can save you thousands and give you peace of mind.

How Much Does It Cost To Replace Windows In Minnesota?

Thinking about replacing your windows? That’s a smart move! New windows can make your home more comfortable, boost curb appeal, and help cut down on energy bills.

But let’s be honest: the first thing you probably want to know is how much it’s gonna cost.

In this post, we’ll shed some light on how much does it cost to replace windows in Minnesota, and what actually affects the price.

Plus, we’ll also break down our window replacement prices at Craftsmen Home Improvements .

Our Window Replacement Prices

We charge between $900 and $1,300 to replace a standard white vinyl insert window.

If you’re going with wood full-frame windows, those usually run between $2,800 and $3,500 each.

Vinyl inserts are quicker to install and more budget-friendly. Wood full-frame windows are custom-ordered and take more time due to the extra framing, finishing, and hardware involved.

Our pricing includes:

  • Removing the old window
  • Installing the new one
  • Making sure everything is finished clean and properly sealed

Reach out for a quote based on your home and window type.

Check Out Our: Twin Cities window replacement services

Average Window Replacement Cost

Replacing windows in Minnesota costs anywhere from $300 to $1,500 per window. That includes both materials and labor.

Full-home replacements could run anywhere from $5,000 to $20,000, depending on how many windows you’ve got and what kind you’re going with.

If you’re going with basic vinyl windows, you’re likely on the lower end of that range. But if you go with High-end wood or fiberglass windows, you’re looking closer to the top.

But don’t stress too much over the big numbers. There’s a lot of wiggle room here based on the choices you make.

Average Window Replacement Cost

Factors That Affect The Cost Of Window Replacement

There’s a lot more to window replacement costs than just picking out a new pane and popping it in. The final price depends on a handful of things.

Here are some of the biggest factors:

#1 Window Material

The material you choose is the biggest factor that affects window replacement costs. Here’s a rough breakdown of the averages:

  • Vinyl windows: $300-$700 per window (most popular in Minnesota)
  • Wood windows: $800-$1,300 per window
  • Fiberglass windows: $700-$1,200 per window (super durable)
  • Aluminum windows: $400-$800 per window (strong but poor insulation)

Choosing the right material is a balance between look, performance, and budget.

Also Read: 7 Signs To Replace Windows

#2 Window Type

The type of window you pick will also change how much it costs.

A standard double-hung window (where both the top and bottom sashes slide) is pretty cost-friendly. But if you want a bay window that sticks out from the wall or a large picture window for amazing views, expect to pay more.

Casement windows that open with a crank, sliders that move horizontally, or custom-shaped windows like arches or circles, all come with a higher cost too.

The more complex the design, the more you’ll likely pay for both materials and installation.

#3 Number Of Windows

Simple math here: more windows = more money.

If you’re only replacing a couple windows that are cracked, it’s gonna cost way less than replacing every single window in the house.

That said, many window companies offer bulk discounts, so you might get a better deal per window if you’re doing a full-home replacement. Plus, doing them all at once can save on labor charges over time.

#4 Full-Frame Vs Retrofit Window Replacement

You’ve got two main installation options:

Full-frame replacement removes everything down to the studs. It costs more ($200-$300 extra per window) but solves any hidden damage issues.

Retrofit installations (also called insert or pocket replacement) keep the existing frame and just replace the window unit.

They’re cheaper but work only if your current frames are in good shape.

That said, full-frame replacements are often recommended in Minnesota because of potential moisture damage that might be hiding in your walls after years of freezing and thawing cycles.

Also Read: Who To Call For Leaking Windows

#5 Energy Efficiency Features

Minnesota winters aren’t exactly mild. So most homeowners here look for energy-efficient windows that can help keep heating bills down.

Features like double-pane or triple-pane glass, low-emissivity (low-E) coatings, and argon or krypton gas fills between the panes can all add to the cost.

The flip side? These upgrades can pay for themselves over time in energy savings.

Plus, your home just feels cozier when the cold stays out and the warm air stays in.

#6 Labor Costs

Labor is a big part of the total price, and rates can vary depending on the contractor and the complexity of the job.

Installing standard windows is usually faster and cheaper than working with large or custom windows. If your home has structural issues, tricky access points, or you’re switching window styles entirely, that can increase labor time, and cost.

It’s tempting to go with the lowest bid, but experience matters. A skilled installer might charge more, but they’ll get it done right and help avoid leaks, drafts, or long-term problems.

#7 Brand And Quality

Factors That Affect The Cost Of Window Replacement

Like anything else, the brand and quality of your windows matter.

Higher-end brands tend to cost more because they’re known for their durability and design. Some brands even offer better warranties, which could be a factor if you’re looking for long-term protection.

Cheaper brands might look fine at first but wear down faster or have fewer options for customization.

But just because a window is from a fancy brand doesn’t automatically mean it’s worth the extra cash. Just choose windows that are right for your needs, not just the name on the box.

Also Read: How much does it cost to replace a roof in Minnesota?

#8 Location

Where you live in Minnesota will also affect the cost to replace windows.

In bigger cities like Minneapolis, labor and permits might cost more than in smaller towns.

Local supply chains and availability of materials mattress too as some products may need to be ordered from out of state, which can increase wait times and costs.

Plus, climate matters. In northern parts of the state, where winter temperatures drop hard, you’ll likely need stronger insulation features, which bumps up the price. Your location influences both what you need and what it costs to get it done.

#9 Permits And Regulations

Some cities or counties in Minnesota require permits for window replacement (especially for larger jobs or full-frame replacements).

This usually adds $100-$300 to your project.

Rules can also differ based on historic homes or HOA guidelines.

The good news is, many contractors will take care of the permits for you. But make sure you ask upfront so there are no surprises later on.

#10 Additional Features

Windows today can do a lot more than just let in light.

You can add features like built-in blinds (great for rooms where you want privacy without the hassle), impact-resistant glass (especially helpful if you live in a windy area), or soundproofing for noisy streets.

Decoratives like grille patterns, tinted glass, or custom finishes can also raise the price.

These aren’t must-haves for every home, but if you’re upgrading anyway, it might be worth looking into a few extras that boost comfort, style, or safety.

Bottom Line

Replacing windows in Minnesota can run anywhere from $300 – $1500 depending on what you want and need.

If you’re thinking about making the switch, start by figuring out your priorities: comfort, looks, budget, or all of the above.

Then get a few quotes from local pros and compare your options.

Remember, you don’t have to do it all at once. Do a few windows at a time if that’s what your budget allows. Just make sure you go with a team that knows what they’re doing!

Caulk Cracking Around Windows? (Here’s Why)

Got cracks showing up around your windows? Super frustrating, right?

You finally get everything sealed and looking good, and then – those annoying little lines show up like the caulk just gave up. It’s a common issue, especially on older homes or spots that take a beating from the weather.

In this post, we’ll talk about why caulk cracks around windows, what’s probably going wrong, and how to fix it without turning it into a giant project.

Why Does Caulk Crack Around Windows?

Here are the 5 main reasons behind cracked caulking around windows:

Temperature Changes

The biggest reason why caulk cracks around windows is temperature changes.

Houses move a little bit all the time, especially around windows. When it’s hot, materials expand. When it’s cold, they contract. That shift might be small, but it happens constantly, day and night, season after season.

This constant expanding and contracting of materials causes stress on the caulk

Over time, it can’t handle that pressure, and cracks begin to form.

Also Read: Who To Call For Leaking Windows?

Aging And Weathering

Caulk isn’t made to last forever, and, just like us, it gets older and more fragile as time goes by.

The sun’s UV rays break down caulk, and make it brittle and easy to crack. Rain slowly wears it down. Wind pushes dust and dirt against it. And then there’s ice and snow adding pressure during the winter.

All of that adds up. Over the years, the caulk dries out, becomes less flexible, and starts pulling away from the surface.

Why Does Caulk Crack Around Windows

So if you’ve had the same caulk around your windows for years, it’s just doing what it does naturally – aging. And as that happens, it’s more likely to give way and start cracking, especially in areas where the weather takes a beating.

Wrong Type Of Caulk

The next reason why caulk is cracking around windows is because you used the wrong product.

There are dozens of caulk options, and picking the wrong one is super easy.

Some are made just for indoors. Some are only for dry areas. Others aren’t designed for movement at all.

If you use kitchen or bathroom caulk around your windows, for example, it’s not going to last. Same goes for cheap general-purpose caulks as they often don’t have enough stretch.

For windows, you want something rated for exterior use, with flexibility and weather resistance.

Poor Surface Prep Or Uneven Application

Another big reason for cracks is poor preparation or sloppy application.

If the area wasn’t cleaned first – like if it had dust, old paint chips, or moisture, the caulk won’t bond well. That weak bond leads to early cracking or peeling.

And it’s not just the prep. The way it’s applied matters too. A thin or patchy bead leaves gaps. If it’s not pressed in properly or tooled smoothly, it won’t seal evenly.

These little mistakes add up fast. So even “new” caulk might fail in just a few months if the prep or technique wasn’t right.

Also Read: Is James Hardie Siding Is Worth It?

Moisture Exposure

Windows can get pretty wet, especially after a storm. If the caulk around your windows is constantly exposed to moisture or water, it can start to degrade faster.

Water seeps into tiny gaps and makes the caulk swell and break down over time.

If you live in a region with heavy rainfall or extreme humidity, your caulk might be more prone to cracking because of this moisture exposure.

How To Fix Cracked Caulk Around Windows

Now that we’ve got the “why” out of the way, let’s talk about the “how.” Fixing cracked caulk is actually pretty easy, and you don’t need to be a pro to do it yourself.

How To Fix Cracked Caulk Around Windows

Here’s how to get it done:

#1 Remove Old Caulk

The first step is to get rid of the old caulk.

It’s tempting to just slap new caulk on top of the cracked stuff, but that won’t do you any good in the long run. The old caulk needs to come out so the new stuff can form a good bond.

You can use a utility knife or a caulk removal tool to scrape it off.

If you’re struggling with stubborn bits, you can even use a little heat from a hairdryer to soften the caulk and make it easier to remove.

Be patient and take the time to remove all the old caulk. It’ll make the new stuff lasts longer.

Also Read: When To Replace Windows

#2 Clean The Surface

Once the old caulk is gone, it’s time to clean the surface.

You want to make sure there’s no dust, dirt, or old adhesive left behind.

Use a clean cloth or rag, and a bit of rubbing alcohol or soapy water to wipe down the area. Let everything dry completely before you move on to the next step.

If the surface isn’t cleaned properly, your new caulk might not adhere well, and you could be back to square one.

#3 Apply New Caulk

Grab your caulk gun (or squeeze tube, if that’s what you’re using), and apply a thin, even bead of caulk around the window seam.

Be sure to follow the manufacturer’s instructions for your caulk, as some need a specific temperature range or application method.

Once the bead is applied, use a wet finger or a caulk smoothing tool to smooth it out.

This will ensure a neat finish and help the caulk seal properly. Don’t forget to check for any gaps and fill them in before moving on.

#4 Let It Cure

This is the step that people often overlook, but it’s super important.

You can’t just jump right back to opening and closing your window. Most caulks need time to cure and fully set, so read the label to see how long you need to wait. It’s usually anywhere from 24 to 48 hours.

During this time, try not to disturb the caulk or expose it to moisture.

Giving it this time to cure will ensure that it sticks properly and creates a solid seal.

Bottom Line

Cracked caulk around windows is something that happens to all of us. It’s part of owning a house and dealing with the elements.

But the good news is, it’s not a huge fix.

A little bit of time, some elbow grease, and the right materials, and you’ll have your windows sealed up good as new.

FAQs

Why Is My New Caulk Cracking?

If your fresh caulk is already cracking, it’s often because of one of these reasons:

  • The wrong type of caulk was used (like indoor-only or low-flexibility caulk)
  • It was applied too thin or uneven
  • The surface wasn’t cleaned well before application
  • It was applied during poor weather—too cold, too humid, or wet
  • It wasn’t given enough time to cure

Even new caulk can fail fast if one of these things went wrong. The fix usually means scraping it out and redoing it with the right product and better prep.

Caulk Cracking Around Windows In Winter

It’s usually from the cold. When temperatures drop, the materials around your windows shrink. That includes the window frame, the trim, and even the wall. If the caulk doesn’t have enough flexibility, it can’t handle that movement and starts to crack.

8 Reasons Why James Hardie Siding Is Worth It

Thinking about giving your home a fresh new look or updating that old, worn-out siding?

Maybe you’ve heard of James Hardie and are wondering if it’s really as good as everyone says.

Well, it’s true! James Hardie siding is one of the most popular choices out there—and for good reason. It’s tough, low-maintenance, and looks amazing.

In this post, we’re going to walk through 8 reasons why James Hardie siding is totally worth the investment.

#1 It’s Seriously Durable

James Hardie siding is built to last.

It’s made of fiber cement, which is way tougher than regular wood or vinyl. We’re talking about siding that can stand up to wind, rain, and all kinds of tough weather conditions.

No more worrying about your siding cracking, warping, or fading after just a few seasons.

It’s designed to hold up for decades, which means you’re not going to be dealing with repairs or replacements anytime soon. That’s peace of mind right there.

Also Read: Can You Put New Siding Over Old Wood Siding?

#2 Hardly Needs Maintenance

Now, this is music to most homeowners’ ears.

Once it’s up, there’s not a lot you need to do. No annual scraping, patching, or babysitting. It doesn’t rot. It won’t swell or buckle from moisture. And it holds paint really well—like way longer than wood.

Hardly Needs Maintenance

You’ll still want to give it a good rinse every now and then to keep it looking fresh.

But beyond that? Pretty hands-off. Less time on ladders, more time doing literally anything else.

#3 Fire Resistance

If you live in a fire-prone area, fire resistance is a big deal. James Hardie siding doesn’t ignite when exposed to flame. It won’t melt like vinyl siding or catch fire like wood.

In a world where wildfires seem more common every year, this can literally save your home.

Most insurance companies recognize this benefit too. Many homeowners see reduced insurance premiums after installing fiber cement siding.

The material is classified as non-combustible, earning it high marks with building codes everywhere.

#4 Gives Your Home A Great Look

Curb appeal matters! James Hardie siding comes in tons of styles and colors.

Want the classic look of wood without the maintenance headaches? No problem. Looking for something more modern? They’ve got you covered.

You can choose from:

  • Lap siding for that traditional horizontal look
  • Board-and-batten for a distinctive vertical style
  • Shingle siding for that charming coastal vibe

The textures look authentic too – not fake or plastic-like. Many people can’t tell the difference between James Hardie and real wood from the street.

Plus, the color options are practically endless. You can find the perfect shade to match your vision or completely transform your home’s appearance.

#5 Great Warranty

James Hardie stands behind their product in a big way.

They offer a 30-year non-prorated warranty on their siding. This isn’t one of those warranties with a million loopholes and exceptions. It’s straightforward and comprehensive.

The ColorPlus Technology finish even comes with its own 15-year warranty against fading, chipping, and peeling.

This warranty is transferable too, which adds value if you decide to sell your home.

This kind of peace of mind is worth its weight in gold. If anything does go wrong, you’ve got backup. That’s not something you can always count on with other siding materials.

Also Read: How Much Does A Roof Inspection Cost In Minnesota?

#6 Keeps Pests Away

Bugs and critters love wood siding. They see it as both food and shelter.

But they don’t love fiber cement. The fiber cement offers zero nutritional value to insects. Termites can’t eat it. Woodpeckers won’t drill into it. Rodents can’t chew through it easily.

This means your home’s exterior stays intact. No surprise holes or damage from unwanted visitors. No need for those expensive pest control treatments specifically for your siding.

Your home stays looking pristine year after year, without becoming a bug buffet.

#7 It Holds Up In Tough Weather

We all know that Mother Nature can be unpredictable. Extreme heat, freezing cold, heavy rain, you name it. But James Hardie siding can handle it.

Fiber cement doesn’t expand or contract like wood does in changing temperatures, so you won’t see cracks or gaps forming after a tough winter.

It also resists damage from things like hail and heavy wind, so you won’t be replacing pieces every time there’s a storm.

This durability makes it perfect for homes in areas with harsh weather conditions.

#8 Helps With Energy Savings

If you want to lower your energy bills, James Hardie siding can help with that too.

The fiber cement is a good insulator, which means it keeps heat inside during the winter and helps keep your house cooler in the summer. Less energy used means lower utility bills, and who doesn’t like saving a little cash each month?

Plus, if you pair it with good insulation, you’re really optimizing your home’s energy efficiency.

The Downsides Of James Hardie Siding

Let’s be honest – nothing’s perfect. James Hardie siding costs more upfront than vinyl siding. You’re looking at roughly 30-50% higher initial investment. Installation is also more labor-intensive, which adds to the cost.

The Downsides Of James Hardie Siding

Plus, the material is heavy. Really heavy. This makes installation more challenging and typically not a DIY project.

You’ll need professional installers who know what they’re doing. And it can be damaged by improper installation. If the contractors cut corners, you might face issues down the road.

So choosing the right installation team matters almost as much as choosing the siding itself.

Also Check Out Our James Hardie Siding Installation Services

When Is James Hardie Siding Worth It?

James Hardie is 100% worth considering if:

  • You plan to stay in your home for 7+ years (to recoup the investment)
  • You live in an area with extreme weather conditions
  • Your current siding needs frequent repairs or maintenance
  • You want to increase your home’s value and curb appeal

It’s especially worth considering if you’re tired of painting wood siding every few years or if you’ve had issues with vinyl siding cracking or warping.

The long-term savings on maintenance alone can justify the higher upfront cost.

But if you’re flipping a house or want the absolute cheapest option short-term, this probably isn’t the one. You’ll get more bang for your buck if you’re thinking of the big picture.

Bottom Line

At the end of the day, James Hardie siding is an investment that pays off.

It’s durable, requires almost no maintenance, and looks great. Plus, it offers added protection from pests, extreme weather, and even fire.

If you’re looking for a siding option that can handle it all and still keep your home looking sharp, James Hardie is definitely worth considering. It’s a solid choice that’ll serve you well for years to come.

So, if you’re ready for an upgrade, this might just be the perfect fit for your home!

How Much Does Siding Cost In Minnesota? (Guide & Our Prices)

If you’re thinking about replacing or installing siding on your home in Minnesota, one of the first questions you probably have is, “How much is this going to cost?”

The truth is, the cost of installing siding can vary a lot.

It depends on the material you choose, the size of your home, and other factors.

In this guide, we’ll give you a clear idea of how much siding costs in Minnesota, and share some of our own rates to help you plan your budget.

How Much Does Siding Cost In Minnesota?

Siding costs about $4 – $13 per square foot in Minnesota.

For an average 2,500-square-foot house, you’re looking at somewhere between $10,000 and $32,500. The final price depends on your home’s size, layout, and the type of siding you go for.

And if you’ve got old siding that needs to be removed first, that’ll add an extra $0.70 to $2.00 per square foot.

Also Read: How much does a roof inspection cost

Average Siding Costs In Minnesota By Material

The cost of siding in Minnesota can differ quite a bit depending on the material.

Some options, like vinyl, are more budget-friendly, while others, like stone or brick, can be a bit more expensive because of the materials and installation labor.

Here’s a rough idea of what you can expect to pay per square foot for different types of siding:

Siding Material Cost per Square Foot Installed Cost For A 2,500 SF House
Vinyl $4 – $12 $10,000 – $30,000
Masonite $4 – $8 $10,000 – $20,000
Board and Batten $5 – $13 $12,500 – $32,500
Log / Wood $5 – $15 $12,500 – $37,500
Cedar $6 – $16 $15,000 – $40,000
Aluminum $6 – $10 $15,000 – $25,000
Fiber Cement $6 – $15 $15,000 – $37,500
Engineered Wood $7 – $12 $12,500 – $37,500
Steel $7 – $16 $17,500 – $40,000
Stucco $7 – $17 $17,500 – $42,500
Brick $8 – $18 $20,000 – $45,000
Stone $10 – $45 $10,000 – $25,000*

Our Siding Prices

Our siding installation costs around $27,000 to $38,000 for an averaged sized home.

We’re a James Hardie contractor, which means you’re getting work from a trained, vetted, and proven professional. Unlike regular contractors, we’ve gone through extensive training on James Hardie’s best practices, maintain proper insurance, and have a proven track record of high-quality installations.

Here’s what’s included in our siding installation:

  • Removing and disposing of old siding
  • Inspecting and repairing the exterior walls if needed
  • Installing siding
  • Sealing and flashing
  • Painting or finishing touches to make it look perfect
  • Full cleanup so your home looks great when we’re done

Check Out Our James Hardie profile here.

Factors That Affect The Cost Of Siding

Now that you have a general idea of siding costs, let’s take a look at the factors that can make the price go up or down in Minnesota:

#1 Siding Material

As you already saw, the siding material you pick is the biggest price factor.

Vinyl is the cheapest, no doubt, but it’s not as durable as other options like fiber cement or steel. If you want something that lasts a long time, you might look at those.

Wood siding can look amazing, especially if you go for something like cedar, but it’ll cost more.

On the other hand, brick or stone veneer is really sturdy, and they last forever, but the expensive.

#2 Home Size

It’s pretty simple – the bigger your house, the more siding you’ll need.

Larger homes will naturally require more materials, which increases the overall cost of the job.

The total square footage of your home will directly impact the number of materials required, and larger homes can easily push the cost into the higher end of the range.

Plus, larger homes may have more intricate features like multiple stories, porches, and architectural details. These features not only require more time to install but also more precision, which can drive up labor costs.

#3 Labor

Labor costs are another major factor in how much your siding project will cost.

Contractors charge based on a few things:

  • How much work is involved
  • How complicated the job is
  • Local cost of labor

Generally, labor costs range from $3 to $5 per square foot, but this can vary depending on where you live and how much experience the contractor has.

Labor might cost more if your home has a lot of custom features, like ornate trim, multiple angles, or if you’re choosing a more complicated siding material that requires more expertise to install (like fiber cement or cedar).

#4 Removal Of Old Siding

If you’ve got old siding that needs to be taken down before the new stuff goes up, that’s going to add to your total cost.

You can’t just slap new siding on top of the old – everything needs to come off.

The removal typically runs between $1 and $2 per square foot, but it could be higher if your old siding is tough to get off, like brick or wood shingles.

Plus, if the old siding contains asbestos or is otherwise hazardous, removal could become more complicated and expensive. In this case, you’ll want to factor in additional costs for safe removal and disposal.

Also Read: Can You Put New Siding Over Old Wood Siding?

#5 Repairs Before Installations

Before you install the new siding, you’ll need to check the underlying structure of your home.

If there’s any water damage, mold, or rot, that needs to be fixed before the siding goes up. If you don’t take care of these issues, you could run into bigger problems down the line.

Any repairs will obviously add to the overall cost of the project.

The good news is, a lot of contractors will offer a free inspection as part of their estimate. They’ll check out your home and point out any repairs that need to be made before the siding goes up.

#6 Your Location

Where you live in Minnesota also affects siding costs.

If you’re in a bigger city, like Minneapolis or St. Paul, the labor tends to be more expensive because there’s more demand for skilled contractors.

On the flip side, rural areas may have lower labor costs, but you might have fewer contractors to choose from, and it could be harder to find someone with the right experience for your project.

Materials can also get more expensive if they have to be shipped from far away, so if you live in a more remote area, be prepared for that.

#7 Permits And Inspections

Some cities or counties in Minnesota require a permit for siding installation, while others don’t.

If a permit is required, you’ll need to factor in the cost of acquiring it.

Permits can cost anywhere from $50 to a few hundred dollars, depending on where you live.

After the siding is installed, there may also be an inspection fee, especially if you’re using materials like fiber cement or stone veneer.

Also Read: Who To Call For Leaking Windows?

Best Siding Options For Minnesota’s Climate

Minnesota has all four seasons, with harsh winters and hot summers, so it’s important to choose a siding that can handle those extremes.

Here are the top siding options that can stand up to the Minnesota climate:

  • Vinyl siding: Affordable, low-maintenance, and good for extreme temperatures.
  • Fiber cement: Durable, low-maintenance, and resistant to weather.
  • Steel siding: Tough, fire-resistant, and handles the cold well.

Bottom Line

At the end of the day, siding your home is a big investment, but it’s one that can pay off.

The cost will depend on factors like the material, the size of your home, and where you live in Minnesota. On average, expect to spend anywhere from $10,000 and $32,500.